20g Protein Cottage Cheese Pizza Crust Bowls You’ll Crave
Okay, let me tell you about the night I accidentally invented these cottage cheese pizza crust bowls—because honestly, that’s how most of my best recipes happen! It was one of those chaotic weeknights where the kids were hangry, my husband was texting “what’s for dinner?”, and I had exactly 30 minutes before someone melted down. I stared at my fridge like it held the secrets of the universe, then spotted a tub of cottage cheese that needed using. “What if…” I thought, mixing it with some almond flour and spices. Twenty minutes later? Crispy little pizza bowls packed with protein that had my whole family fighting over the last one! Now they’re our go-to when we want that pizza fix without the carb crash. The best part? Each bowl has about 20 grams of protein and only 250 calories—so you can enjoy that cheesy goodness guilt-free.
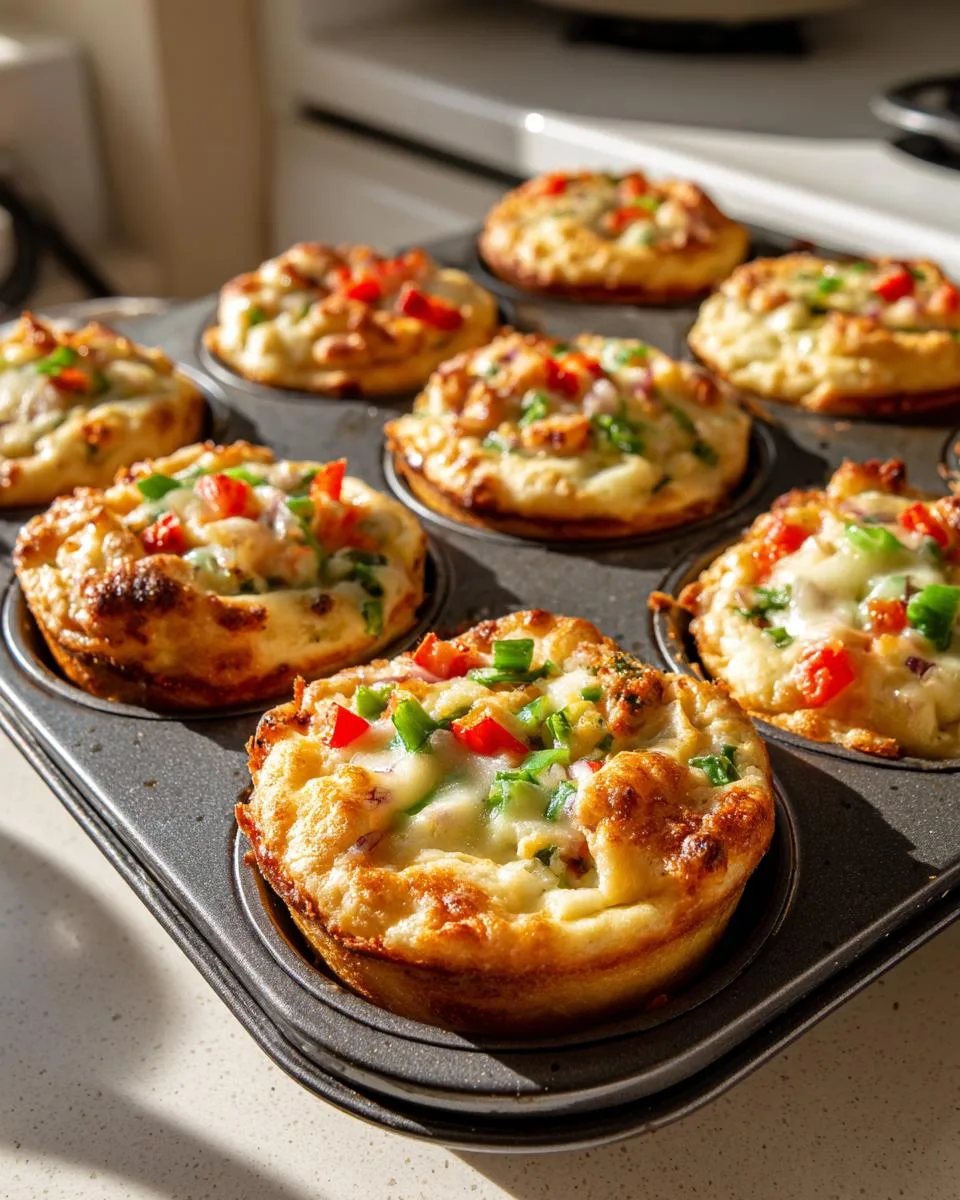
Table of Contents
Why You’ll Love These Cottage Cheese Pizza Crust Bowls

Listen, these little bowls are game-changers—here’s why:
- Protein powerhouse: Each bowl packs 20g of protein thanks to that magic cottage cheese base (bye-bye, post-pizza slump!)
- Crazy customizable: Got picky eaters? Swap toppings like a pizza buffet—my kids go nuts for turkey pepperoni while I load mine with veggies
- Weeknight hero: From fridge to table in 40 minutes flat (and 10 of those are just waiting for cheese to bubble!)
- Kid-approved: The bowl shape makes it fun—my 5-year-old calls them “pizza hats” and eats every last crumb
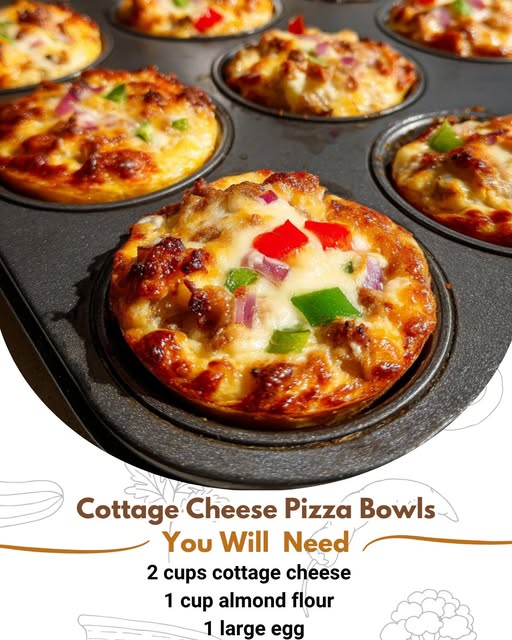
Ingredients for Cottage Cheese Pizza Crust Bowls
Here’s everything you’ll need to make these little pizza miracles—I’ve included my favorite brands and prep tips that make all the difference:
- 2 cups cottage cheese – I use full-fat for extra creaminess, but low-fat works too (just drain any excess liquid first)
- 1 cup packed almond flour – Measure it like brown sugar—really press it into the cup for accuracy
- 1 large egg – Room temperature blends smoother (I just set mine out while preheating the oven)
- 1 teaspoon garlic powder – The secret flavor booster! Fresh minced garlic works if you’re feeling fancy
- 1 teaspoon Italian seasoning – My jar is always half-empty because I use it on everything
- 1/2 teaspoon salt – Trust me, this balances the cottage cheese perfectly
- 1/4 teaspoon black pepper – Freshly cracked if you’ve got it
- 1/2 cup shredded mozzarella – Pre-shredded works, but block cheese melts smoother
- 1/2 cup pizza sauce – My shortcut? Jarred marinara with a pinch of red pepper flakes
- 1/2 cup diced veggies – Bell peppers, onions, mushrooms—whatever’s wilting in your fridge
- 1/2 cup cooked protein – Turkey bacon’s our favorite, but leftover rotisserie chicken is gold
Pro tip: Keep toppings diced small—big chunks make the bowls harder to eat. And yes, you can totally go meatless if that’s your jam!
How to Make Cottage Cheese Pizza Crust Bowls
Alright, let’s get these pizza bowls happening! I promise it’s easier than folding a fitted sheet—just follow these simple steps and you’ll have crispy, cheesy goodness in no time.
Step 1: Prepare the Dough
First, grab your biggest mixing bowl—trust me, you’ll need the space! Dump in the cottage cheese (don’t worry if it looks lumpy—that’s part of the charm), almond flour, egg, and all those glorious seasonings. Now roll up your sleeves and mix it like you mean it! You’re looking for a thick, slightly sticky dough that holds together when you pinch it. Pro tip: If it seems too wet, add another tablespoon of almond flour. Too dry? A splash of water works wonders.
Step 2: Shape and Bake the Crust
Here’s where the magic happens! Spray that muffin tin like you’re preparing for a nonstick revolution—these little bowls like to stick if you’re not generous. Scoop about 1/4 cup of dough into each cup, then use slightly damp fingers to press it up the sides, forming perfect little bowls. Don’t stress about perfection—rustic is charming! Pop them in the oven at 375°F for 20 minutes until they’re golden and firm to the touch. Oh, and resist the urge to fill them immediately—let them cool for 5 minutes so they hold their shape (I learned this the hard way with a collapsed bowl tragedy!).
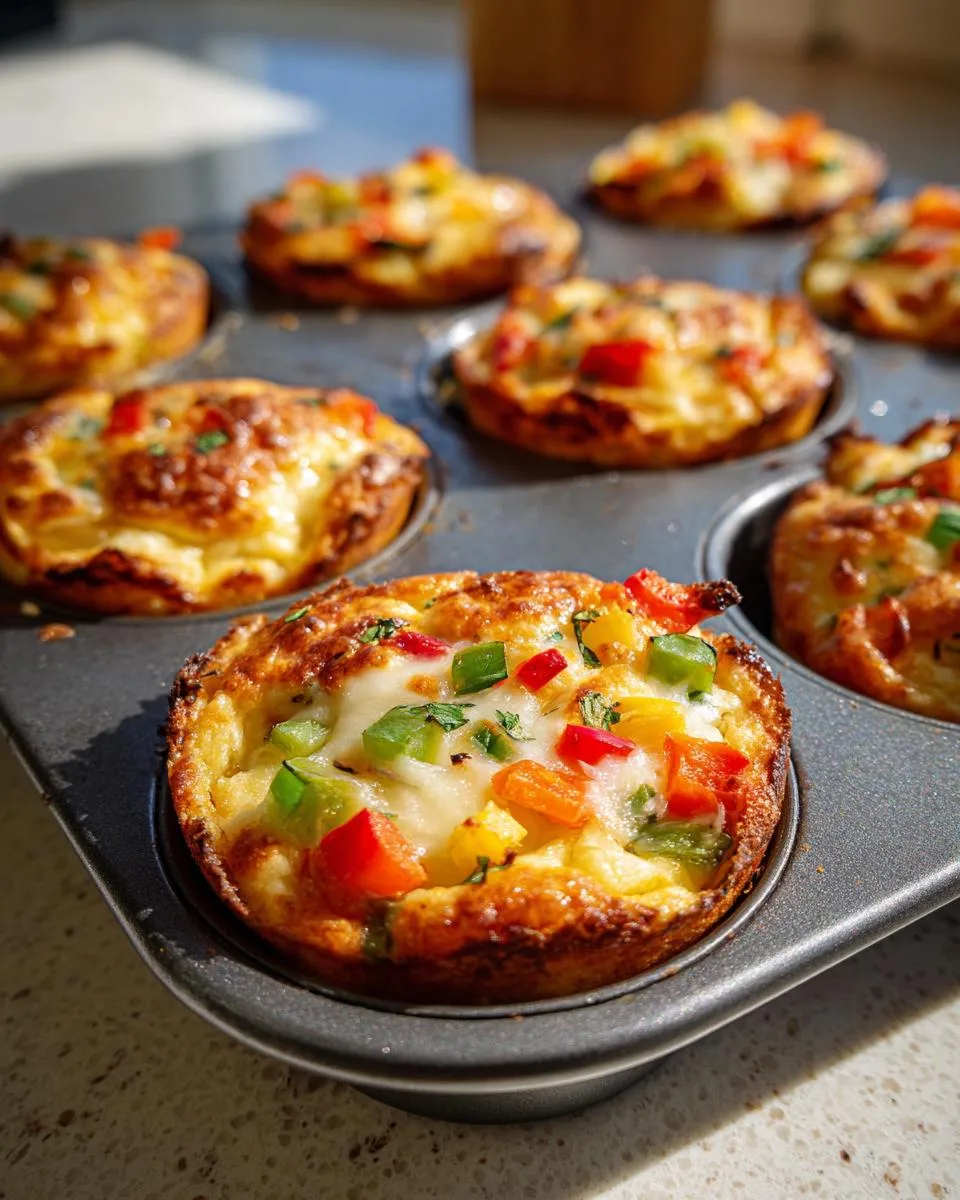
Step 3: Add Toppings and Finish Baking
Now the fun part—decorate your edible bowls like tiny pizza canvases! Start with a spoonful of sauce (about 1 tablespoon per bowl), then pile on those veggies and protein. Top it all with a generous sprinkle of mozzarella—this is no time to be shy! Slide them back into the oven for 10 more minutes, just until the cheese gets all bubbly and slightly golden. Your kitchen will smell like a pizzeria, and your family will come running!
Tips for Perfect Cottage Cheese Pizza Crust Bowls
After making these dozens of times (and yes, having a few hilarious fails along the way), here are my absolute must-know tips for pizza bowl success:
Grease like you mean it: That muffin tin needs more spray than you think—get into every nook and cranny! I learned this after spending 10 minutes prying out a bowl that fused itself to the pan. A light dusting of almond flour after greasing gives extra insurance.
Topping freedom is key: These bowls are basically edible blank canvases. My kids go wild making “pizza art” with their toppings—heart-shaped pepperoni for Valentine’s Day, smiley faces with olives. Leftover taco meat? Brilliant. Last night’s roasted veggies? Perfect. Even breakfast versions with scrambled eggs work!
The cooling patience test: I know, I know—you want to dig in immediately. But letting the crusts cool for 5 minutes after the first bake makes them sturdy enough to hold toppings without collapsing. Set a timer if you’re impatient like me!
Leftover magic: These keep surprisingly well! Store cooled bowls (without toppings) in an airtight container for up to 3 days. When ready, add fresh toppings and rebake for 8 minutes. They won’t be quite as crisp, but still delicious—my husband microwaves his for 30 seconds when he’s extra hungry.