Low Carb Philly Cheesesteak Casserole: A 35-Minute Family Favorite
Oh my gosh, you guys – this Low Carb Philly Cheesesteak Casserole has become my family’s absolute favorite weeknight lifesaver! I created it one crazy Tuesday when my kids were begging for “real cheesesteaks” but I needed something quick, low-carb, and packed with protein. The moment that first cheesy, meaty bite hit my tongue, I knew I’d struck gold. It’s got all that glorious Philly cheesesteak flavor – the tender beef, melty cheese, sweet peppers and onions – but without the carb crash from the bread. Best part? It comes together in about 30 minutes with ingredients I always have on hand. Even my picky 7-year-old cleans his plate when I make this!
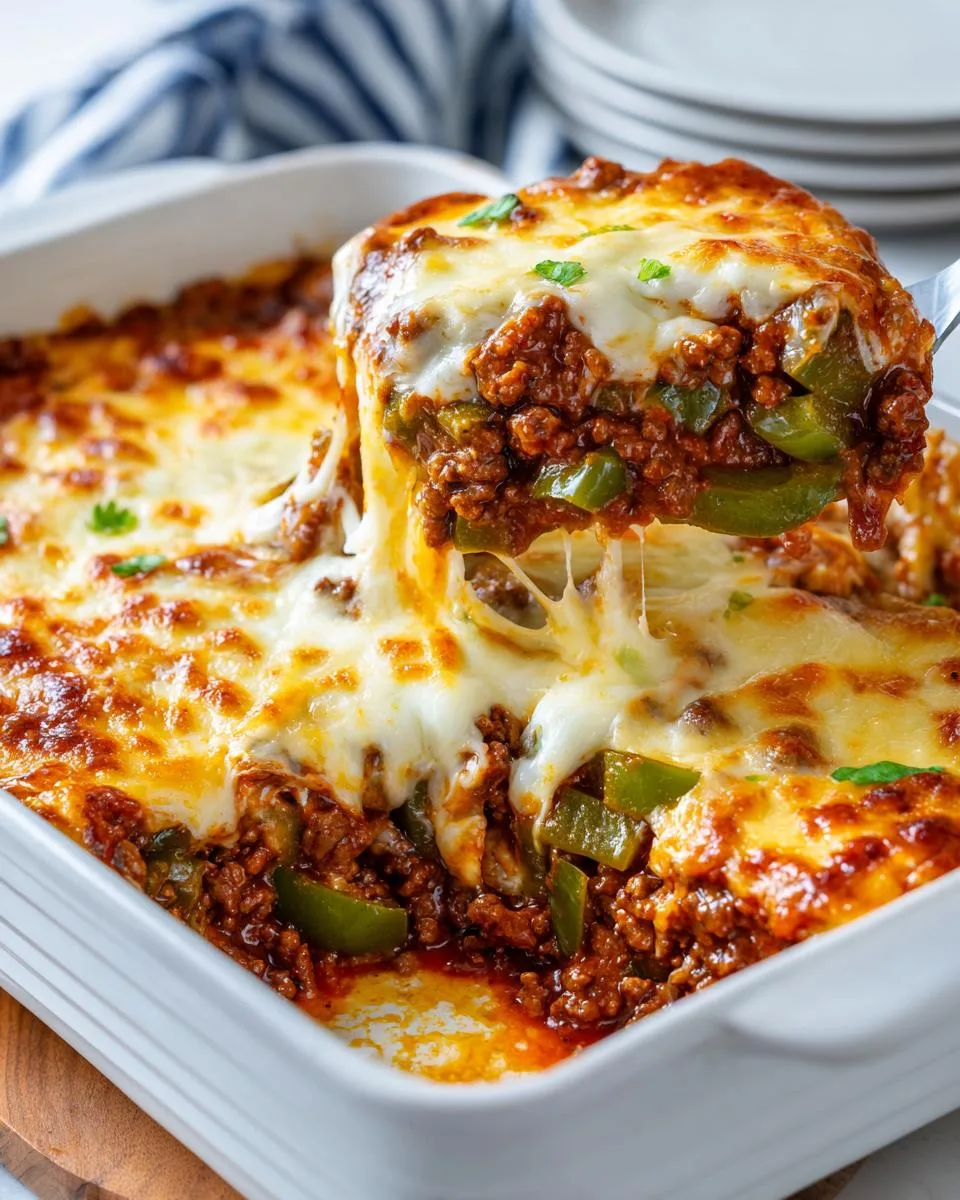
Table of Contents
Table of Contents
Why You’ll Love This Low Carb Philly Cheesesteak Casserole
Listen, I don’t just throw around the word “love” lightly when it comes to recipes, but this one? It’s special. Here’s why:
- All the flavor, none of the guilt: That classic Philly cheesesteak taste without the carb-heavy bread? Yes please!
- Weeknight superhero: From fridge to table in 35 minutes flat – even faster than waiting in line at a cheesesteak joint!
- Kid-approved magic: My little ones gobble this up faster than chicken nuggets (and that’s saying something).
- Keto-friendly: At just 6g net carbs per serving, it fits perfectly into low-carb lifestyles.
- One-pan wonder: Less dishes means more time for… well, anything besides washing dishes!
Trust me, once you try this you’ll be making it on repeat like we do!
Ingredients for Low Carb Philly Cheesesteak Casserole
Okay, let’s talk ingredients – and I promise, nothing fancy here! This is one of those magical recipes where everything is probably already in your fridge or pantry. Here’s what you’ll need to make this cheesy masterpiece:
- 1 lb (450g) ground beef or thinly sliced steak – I usually grab whatever’s on sale, but ribeye makes it extra special!
- 1 green bell pepper, sliced thin – About 1/4-inch strips are perfect for that authentic cheesesteak bite
- 1 small onion, sliced thin – Yellow or white both work great here
- 1 cup shredded provolone or mozzarella cheese – Provolone gives that classic Philly taste, but mozzarella melts like a dream
- 4 oz (115g) cream cheese – Let it soften on the counter for 10 minutes first – trust me, it mixes in way easier
Optional but awesome:
- Seasonings: A pinch of salt, black pepper, and garlic powder take it to the next level
- Add-ins: Sliced mushrooms if you’re feeling fancy, or some hot peppers if you like a kick!
See? Told you it was simple! Now let’s get cooking…
How to Make Low Carb Philly Cheesesteak Casserole
Alright, let’s dive into making this beauty! I promise it’s easier than folding a fitted sheet (why are those things so impossible?). Just follow these simple steps and you’ll have a cheesy, meaty masterpiece in no time.
Prep the Meat and Veggies
First things first – let’s get that skillet sizzling! Here’s how I do it:
- Preheat your oven to 350°F (175°C) – this gives it time to get nice and toasty while we prep everything else.
- Brown that beef! Grab your favorite large skillet (I use my trusty cast iron) and cook the ground beef or steak over medium heat. Break it up with your spoon as it cooks – we want nice, even crumbles. Drain any excess fat (but leave just a little for flavor!).
- Veggie time! Toss in those sliced peppers and onions. Cook them until they’re tender but still have a bit of crunch – about 5 minutes should do it. You’ll know they’re ready when the onions turn translucent and the peppers brighten up. Don’t overcook them or they’ll turn to mush in the oven!
Combine and Bake
Now for the fun part – making it all cheesy and wonderful:
- Cream cheese magic: Drop in that softened cream cheese and any seasonings you’re using. Stir like crazy until it’s all melted and creamy – this is what gives the casserole that luscious texture!
- Transfer to baking dish: I use an 8×8 inch dish sprayed with a little oil. Spread the mixture evenly – no need to be perfect, but try to get it roughly level.
- Cheese blanket: Sprinkle that shredded cheese over the top like you’re tucking it in for a nap. Want extra cheesiness? Go ahead and add more – I won’t tell!
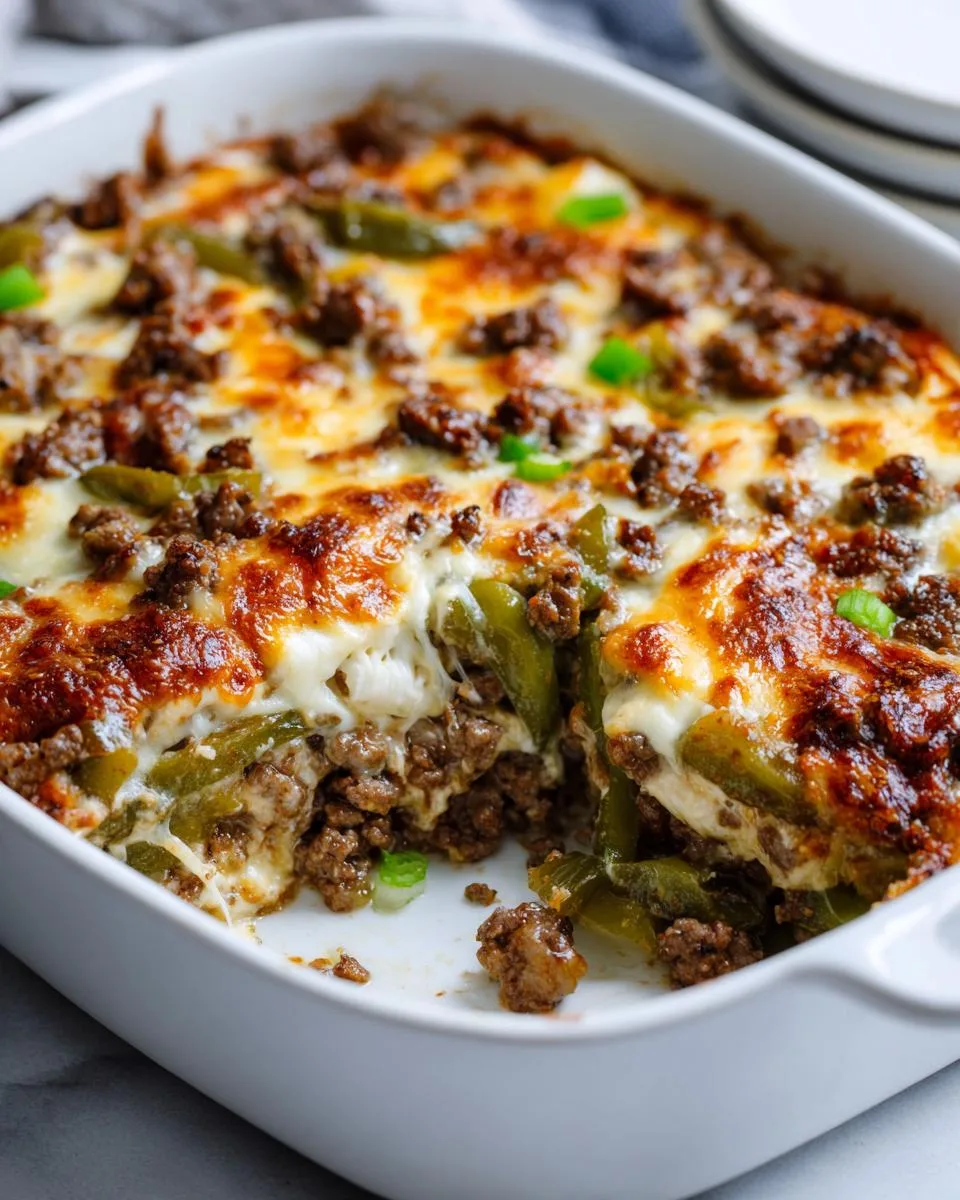
- Bake to perfection: Pop it in the oven for about 20 minutes. You’ll know it’s done when the cheese is bubbly and golden in spots. If it starts browning too fast, just lay a piece of foil loosely over the top.
- Rest time: Let it cool for 5 minutes before serving – this keeps it from being a molten lava situation (learned that the hard way!).
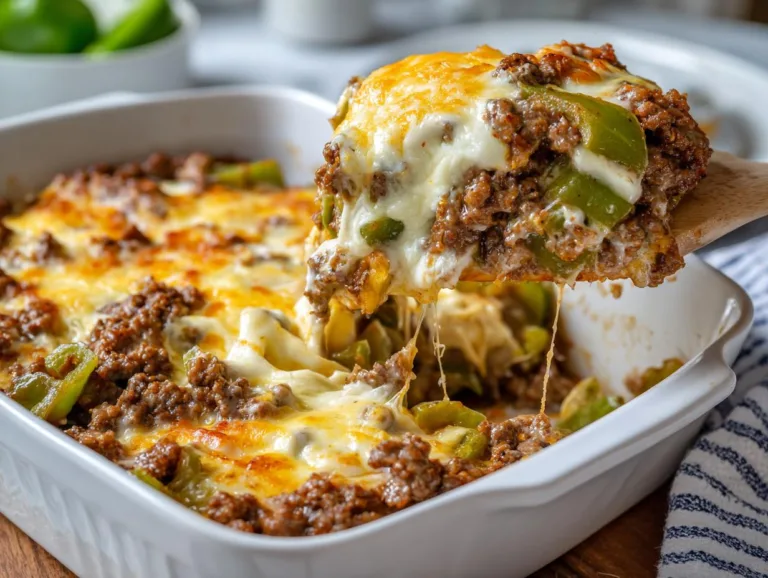
See? Easy peasy! Now comes the best part – digging into that cheesy, meaty goodness. Your kitchen is going to smell amazing!
Tips for the Best Low Carb Philly Cheesesteak Casserole
Okay, I’ve made this casserole more times than I can count (my family’s obsessed!), and I’ve picked up some tricks along the way:
- Drain that fat: After browning the meat, tilt your skillet and spoon out excess grease – keeps it from getting soggy.
- Slice veggies thin: Makes them cook faster and gives that authentic cheesesteak texture.
- Soft cream cheese is key: Leave it on the counter while you prep other ingredients – it blends in way smoother.
- Watch the bake time: Ovens vary – pull it when the cheese is bubbly with golden spots, not dark brown.
- Let it rest: Those 5 minutes after baking make all the difference for clean slices.
- Double batch: This freezes beautifully – just wrap individual portions for easy future meals!
Follow these little tips and you’ll have cheesesteak perfection every single time!
Low Carb Philly Cheesesteak Casserole: A 35-Minute Family Favorite
- 1 lb (450g) ground beef or thinly sliced steak
- 1 green bell pepper, sliced
- 1 small onion, sliced
- 1 cup shredded provolone or mozzarella cheese
- 4 oz (115g) cream cheese
- Optional seasonings: salt, pepper, garlic powder
- Optional add-ins: sliced mushrooms, hot peppers
Instructions
- Preheat your oven to 350°F (175°C).
- In a large skillet over medium heat, cook the ground beef or steak until browned and cooked through. Drain any excess fat.
- Add the sliced green bell pepper and onion to the skillet, cooking until tender, about 5 minutes.
- Stir in the cream cheese and any optional seasonings until well combined and creamy.
- Transfer the mixture to a greased baking dish, spreading it evenly.
- Top with the shredded cheese, and add any optional add-ins if desired.
- Bake in the preheated oven for about 20 minutes, or until the cheese is bubbly and golden.
- Let it cool for a few minutes before serving.
Notes
- Store leftovers in an airtight container in the fridge for up to 3 days.
- Reheat in the oven or microwave before serving.
- Prep Time: 10 minutes
- Cook Time: 25 minutes
- Category: Dinner
- Method: Baking
- Cuisine: American
- Diet: Low Calorie
Nutrition
- Serving Size: 1 serving
- Calories: 380
- Sugar: 3g
- Sodium: 450mg
- Fat: 28g
- Saturated Fat: 14g
- Unsaturated Fat: 10g
- Trans Fat: 1g
- Carbohydrates: 6g
- Fiber: 1g
- Protein: 26g
- Cholesterol: 95mg
Variations for Low Carb Philly Cheesesteak Casserole
One of my favorite things about this recipe is how easily you can mix it up! Here are some delicious twists we’ve tried (and loved) over the years:
- Meat swap: Ground turkey or chicken works great if you want something lighter. For special occasions, I’ll splurge on ribeye steak slices – so decadent!
- Cheese choices: Pepper jack adds a nice kick, while Swiss gives it that classic “Philly with whiz” vibe. My neighbor swears by mixing half provolone and half cheddar.
- Veggie boost: Mushrooms are a must if you ask my husband – just slice them thin and sauté with the peppers. Sometimes I’ll throw in a handful of spinach at the end for extra greens.
- Spice it up: A dash of Worcestershire sauce or a sprinkle of crushed red pepper flakes takes the flavor up a notch. My brother adds jalapeños – not for the faint of heart!
- Crust option: For those who want just a bit of crunch, try sprinkling crushed pork rinds on top before baking – gives that “breaded” texture without the carbs.
The beauty of this casserole is how forgiving it is – don’t be afraid to make it your own! What variations have you tried? I’m always looking for new ideas to test out in my kitchen. You can also check out my Fajita Chicken Cottage Cheese Bake for another easy dinner idea!
Serving Suggestions
Now that you’ve got this glorious Low Carb Philly Cheesesteak Casserole ready, let’s talk about how to serve it up right! Here are my family’s favorite ways to enjoy this cheesy masterpiece:
- Crispy side salad: A simple mix of romaine, cucumber, and cherry tomatoes with ranch dressing cuts through the richness perfectly. My kids love when I add a few extra shredded carrots for crunch!
- Roasted veggies: While the casserole bakes, toss some zucchini or broccoli in olive oil and roast at the same temp – two dishes with minimal effort!
- Cauliflower mash: Creamy mashed cauliflower makes the ultimate low-carb comfort food pairing. Pro tip: add a garlic clove while boiling the cauliflower for extra flavor.
- Pickle spears: Don’t knock it till you try it – the tangy crunch is amazing with the cheesy beef!
- All by its glorious self: Sometimes we just grab forks and dig right into the baking dish – no shame in our game!
For parties, I’ll cut the cooled casserole into squares and serve them as hearty appetizers with toothpicks. They disappear faster than I can refill the platter! However you choose to serve it, just be ready for compliments – this dish is always a crowd-pleaser.
Storage and Reheating
Okay, let’s talk leftovers – because let’s be real, this casserole is so good you’ll want to make extra! Here’s how I store and reheat mine to keep that fresh-from-the-oven taste:
Fridge storage: Once cooled, cover tightly with foil or transfer to an airtight container. It’ll stay delicious in the fridge for up to 3 days. I like to portion mine out into individual servings for easy grab-and-go lunches!
Freezing: This freezes like a dream! Just wrap cooled portions in plastic wrap, then foil, and pop in the freezer for up to 2 months. Thaw overnight in the fridge before reheating.
Reheating methods:
- Oven method (my favorite!): Preheat to 350°F (175°C), place servings in an oven-safe dish, cover loosely with foil, and bake for about 15 minutes or until heated through. Remove foil for the last few minutes if you want that cheese crispy again!
- Microwave quick-fix: Place a portion on a microwave-safe plate, cover with a damp paper towel (keeps it from drying out), and heat in 30-second bursts until warm. Stir between bursts for even heating.
A little pro tip from someone who’s reheated this more times than I can count – add a tiny splash of water or broth before reheating to keep it moist. And if you’re feeling fancy, sprinkle a little extra cheese on top before warming – it gives that fresh-baked feel all over again!
Nutritional Information
Okay, let’s chat numbers – but remember, these are just estimates based on how I typically make this casserole. Your exact counts might vary depending on the brands you use or if you tweak the ingredients (no judgment here – I’m all about making recipes your own!).
For one serving (about a quarter of the casserole), you’re looking at roughly:
- 380 calories – Satisfying without being heavy
- 26g protein – That beef really packs a punch!
- 6g net carbs – Perfect for low-carb lifestyles
- 28g fat – Mostly from the cheese (the good kind of fat!)
A few things to note:
- Using leaner ground beef will lower the fat content
- Adding extra veggies like mushrooms increases fiber
- Different cheese types can change the numbers slightly
Remember, I’m not a nutritionist – just a mom who loves good food! If you’re tracking macros closely, I’d recommend plugging your exact ingredients into your favorite nutrition calculator. But for most of us, this casserole is a delicious way to enjoy comfort food while keeping carbs in check!
Frequently Asked Questions
Oh, I get asked about this recipe all the time! Here are the questions that pop up most often – and my honest answers after making this dozens of times:
Can I use chicken instead of beef?
Absolutely! I’ve made this with ground chicken and even sliced chicken breast when we want something lighter. The flavor changes a bit, but it’s still delicious. Just watch the cooking time – chicken tends to dry out faster than beef.
Is this really keto-friendly?
You bet! At just 6g net carbs per serving, it fits perfectly into a keto lifestyle. I’ve served this to my keto friends and they couldn’t believe it wasn’t “cheating.” Just be mindful of any add-ins – some veggies or sauces can bump up the carb count.
What’s the best cheese to use?
Personally, I’m team provolone all the way – it gives that authentic Philly cheesesteak taste. But mozzarella melts beautifully, and my husband loves when I use pepper jack for a little kick. Really, any good melting cheese will work here – except maybe blue cheese (unless you’re into that sort of thing!).
Can I make this ahead and refrigerate before baking?
Yes! I do this all the time for busy weeknights. Just assemble everything in the baking dish, cover tightly, and refrigerate for up to 24 hours. When ready, bake as directed – you might need to add 5-10 extra minutes since it’s going in cold. The cream cheese might look a little separated at first, but it all comes together beautifully in the oven!
Help! My casserole came out watery – what went wrong?
Oh no! This usually happens if the beef was too fatty (didn’t drain enough) or the veggies released extra moisture. Next time, try these fixes: 1) Really drain that beef well, 2) Pat your sliced veggies dry with paper towels before cooking, and 3) Let the casserole rest for 10 minutes after baking – the excess liquid often gets reabsorbed!
Got another question I didn’t cover? Drop it in the comments below – I’m happy to help troubleshoot or brainstorm variations with you! After all, that’s how the best recipes evolve. You can also follow along for more quick dinner ideas on my Facebook page!
Final Thoughts
Well friends, there you have it – my absolute favorite way to enjoy Philly cheesesteak flavors without the carb overload! This casserole has saved me on more hectic weeknights than I can count, and I hope it becomes a staple in your kitchen too. There’s just something magical about that first bite – the melty cheese, the tender beef, those sweet peppers and onions all coming together in perfect harmony.
I’d love to hear how it turns out for you! Did your family go crazy for it like mine does? Did you try any fun variations? Drop me a comment below – your feedback and ideas make my day. And if you snap a photo of your cheesy masterpiece, tag me on Instagram @FrostyRecipes so I can see your handiwork!
Most importantly – have fun with it! Cooking should be joyful, not stressful. If you forget an ingredient or burn the cheese a little (been there!), just laugh it off and enjoy the process. After all, some of my best kitchen discoveries came from happy accidents. Now go make some memories – and some seriously delicious low carb comfort food!